![[Code]Hammer](https://codehammer.io/wp-content/uploads/2023/01/cropped-Copy-of-CODE-HAMMER-1.png)
The source code for this article is available on GitHub: https://github.com/jmgraff/fastapi-strawberry-urql
This example will walk you through creating a docker compose based full-stack GraphQL API using FastAPI+Strawberry on the backend, and React+URQL on the frontend.
The associated GitHub repo is a template and is designed to be used as a starting point for new GraphQL projects. Feel free to use it however you want.
What we’re making
In this example, we’ll be making a GraphQL based app, complete with frontend and backend servers, that will simply display and update a string via GraphQL queries.
Here’s what the finished product will look like:
Pretty exciting, right? Well, it might not look like much, but it’s a great starting point for exploring the power of GraphQL as an alternative to REST.
Table of Contents
Prerequisites
I do most of my full-stack web development work in Docker containers on an Ubuntu Linux VM. You should be able to follow along on a Windows machine using just Docker Desktop (which runs a Docker daemon in a Linux VM anyway) but I make no promises there.
If you want to do this on a Mac running on Apple Silicon, you can probably do so with an ARM build of Ubuntu running in a VM. However, I’ve run into significant problems trying to do this as a lot of Docker images aren’t built for that architecture yet.
If you’re following along on Ubuntu (recommended), you’ll need the following:
- The latest Docker version
- The latest NodeJS and NPM
make
Get the latest Docker
Follow the instructions here to get the latest version of Docker running on Ubuntu. This will also install the docker-compose plugin, which we’ll be using.
Get NodeJS 19 and NPM
You can get NodeJS 19 and NPM with the following one-liner:
curl -fsSL https://deb.nodesource.com/setup_19.x | sudo -E bash - && \
sudo apt-get install -y nodejsGet the make utility
If you don’t already have it, install make on Ubuntu with:
sudo apt-get install -y makeOverview of the project directory
I like to set up docker-compose based web projects like this:
- project-directory
- Makefile
- docker-compose.yaml
- docker-compose.dev.yaml
- frontend
- Dockerfile
- Source files, etc.
- backend
- Dockerfile
- Source files, etc.
You can name the “frontend” and “backend” directories whatever you want (i.e. “web” and “api”, or something like that), but you should definitely stick with the one-folder-per-docker-image paradigm so that your source files remain organized. It will also make building those images with docker compose build very easy – you’ll see why later.
The Makefile
This file is the heart of the project, at least from the developer’s (your) standpoint. It’s how we build, run, tear down, and clean up.
export HOSTNAME=localhost
export PROD=1

# Run this only once after cloning the repository
setup:
	npm install && cd frontend && npm install

build:
	docker compose build

dev:
	PROD=0 docker compose -f docker-compose.yaml -f docker-compose.dev.yaml up

prod:
	docker compose up -d

down:
	docker compose down

clean:
	sudo rm -rf node_modules frontend/node_modules frontend/build backend/__pycache__

.PHONY: build dev prod down cleanThis one is pretty simple. For the most part, we’re just making some convenient make targets to run docker compose ... commands, which get a little verbose, especially when dealing with multiple docker-compose.yaml files.
Why use a Makefile?
I like to use Makefiles in just about every project.
Makefiles and the make utility are very old. But, they’re also very simple, and the principles they work on (dependency graphs) still apply to most development efforts today. Even if you have fancier build tools like npm, gradle, or even cmake deeper within your project, a Makefile is a very nice way to tie them all together at the highest level, and provide a convenient interface with familiar commands to build, clean, install, or deploy your project.
They also allow you to create build targets that don’t actually build anything, but serve as a shorthand for common tasks that would be annoying to have to type out every time. For example, make clean doesn’t actually make anything, but it deletes transient files from your project so you can re-build everything from scratch.
Instead of remembering to delete frontend/build, backend/__pycache__, and all the node_modules directories, you can just run make clean.
Instead of remembering the long-ish command PROD=0 docker compose -f docker-compose.yaml -f docker-compose.dev.yaml up, you can just run make dev.
Makefile build targets
- setup – This will install the NPM packages needed for development at the root of the project directory as well as the ones in the
frontenddirectory that will be for our actual application. - build – This builds our container images.
- dev – This brings up our containers in the development configuration by using the
docker-compose.dev.yamlconfig and setting thePRODvariable to 0 (more on that later). - prod – This runs our containers in the production configuration and then daemonizes them with the
-dflag, which just means it won’t immediately start following their logs and they’ll continue to run when you close the console window. - down – This stops and removes the running containers.
- clean – This removes the transient build files in our project that aren’t actually part of our git repo.
At the top, you’ll see we export a couple of environment variables:
- HOSTNAME
- PROD
The HOSTNAME variable
export HOSTNAME=localhost
export PROD=1

# Run this only once after cloning the repository
setup:
npm install && cd frontend && npm installThis variable is used as a single source of truth for the entire application as to what hostname it’s running on. We export it so that it’s available during the build process for the frontend and backend containers.
I did it this way so that if you, for example, want to deploy your application to production at example.com, you won’t have to go through the frontend and backend source files and remove localhost from every web request, then go back and undo that when you want to work on version 2.0.
More on how this variable is used when we go over the actual application code.
The PROD variable
export HOSTNAME=localhost
export PROD=1

# Run this only once after cloning the repository
setup:
npm install && cd frontend && npm installThis variable tells the application whether its running in production mode or not. It’s only really used in the frontend container’s entrypoint, where it launches it in a production server instead of a development server depending on if this variable is set to 0 or 1.
The docker-compose files
The docker-compose.yaml files, if you’re unfamiliar, tell the docker-compose plugin how to build and run your containers in the Docker daemon.
Why have two docker-compose files?
The docker-compose plugin allows you to combine multiple docker-compose YAML files with the -f flag. So, if you have multiple, you can run:
docker compose -f docker-compose.yaml -f docker-compose.dev.yamlThis will merge and/or override the objects within the first, second, third etc. YAML files into one. The reason I have mine split out into two different docker-compose files is that your development configuration is almost always going to be different from your production configuration.
In this project, the development configuration mounts the frontend and backend directories as volumes within their respective containers. Since uvicorn and create-react-app allow hot-reloading when source files change, this greatly speeds up development. But, you don’t want this in production, so we split out our dev config into a separate compose file.
The production configuration, on the other hand, will only launch the containers with the already-built applications inside of them. If you want to change the apps they’re running, you’ll have to change the source code, rebuild the containers, and then bring them back up again. Not very convenient for development, but much more secure for production.
The main docker compose file
This is our main docker-compose file that defines our services.
services:
  backend:
    image: backend
    build: backend
    ports:
      - 8000:8000
    environment:
      - HOSTNAME=${HOSTNAME}
      - PROD=${PROD}
  frontend:
    image: frontend
    build: frontend
    ports:
      - 3000:3000
    environment:
      - REACT_APP_HOSTNAME=${HOSTNAME}
- PROD=${PROD}The ${VARNAME} syntax is how you access environment variables in docker-compose files. Their value will be inserted everywhere this syntax is used.
For our backend service, we’re setting the build directory to “backend”, setting the image name to “backend”, forwarding port 8000 on our local machine to port 8000 on the container, and setting the HOSTNAME and PROD variables to what they were exported as in the Makefile described previously.
Similar to our backend service, our frontend service sets the build directory and image name to “frontend”, and forwards port 3000 on our local machine to port 3000 on the container. The environment section is a little different, though. We’re setting the REACT_APP_HOSTNAME environment variable to the HOSTNAME environment variable exported in our Makefile, because create-react-app will only process environment variables that start with REACT_APP_. The PROD variable is set as it was in the backend service.
The development docker compose file
These are our overrides for running our project in development mode.
services:
  backend:
    volumes:
      - ./backend:/opt/container
  frontend:
    volumes:
- ./frontend:/opt/containerAs you can see, this looks pretty similar to our docker-compose.yaml file above, except its missing all the usual information like ports and image. We don’t need to define that here, since this file will be merged and/or override the values in the docker-compose file specified first when executing docker compose -f docker-compose.yaml -f docker-compose.dev.yaml [command].
In both the backend and frontend services, we’re mounting the source file directories directly into the containers’ working directories. I chose /opt/container as the working directory for both, since the /opt directory is the standard place to put 3rd party software on Linux systems. It’s common for Docker images to just make a new /app or /[projectname] directory right under the root directory, but that feels messy to me. To each their own.
We’re mounting the host system’s source directories into the containers’ working directories because uvicorn (the backend web server) and create-react-app‘s development server (the frontend web server) support hot-reloading code when the source files change. This makes development go a lot quicker. Without this, you’d have to rebuild the containers every time you made a change to the source code.
Backend
Our backend is going to be built using
- uvicorn as the web server
- FastAPI as the framework
- Strawberry as the GraphQL implementation
The backend Dockerfile
This Dockerfile will tell docker compose build how to build our backend container image.
from python:3.9.16-alpine

workdir /opt/container

copy . .

run pip install -r requirements.txt

entrypoint ["python", "main.py"]We’re building this image from the python:3.9.16-alpine image, which will be pulled from Docker hub automatically. We set the workdir to /opt/container as mentioned previously, copy everything from the backend directory into there, then we run pip install on the requirements.txt to install our dependencies described in the next section. Our entrypoint is simply running our main.py file with python – this will be the same for both the production and development configurations.
Your Dockerfiles must be named exactly “Dockerfile” or you will receive an error when trying to build this. That means no lowercase “d” or other artistic liberties taken with the filename.
The backend dependencies
Here’s the contents of requirements.txt:
fastapi
strawberry-graphql
uvicorn[standard]It’s pretty simple as we only need 3 things: FastAPI as our web framework, Strawberry to implement GraphQL, and uvicorn to run it all.
The FastAPI server
The entrypoint for our backend server is found in main.py:
import os
import uvicorn
import strawberry
from strawberry.fastapi import GraphQLRouter
from fastapi import FastAPI
from starlette.middleware.cors import CORSMiddleware

from gql import Query, Mutation

app = FastAPI()

app.add_middleware(
            CORSMiddleware,
            allow_origins=[f"http://{os.getenv('HOSTNAME')}:3000"],
            allow_credentials=True,
            allow_methods=["*"],
            allow_headers=["*"]
        )

schema = strawberry.Schema(query=Query, mutation=Mutation)
app.include_router(GraphQLRouter(schema), prefix="/graphql")

if __name__ == "__main__":
    prod = os.getenv("PROD") == "1"
uvicorn.run("main:app", host="0.0.0.0", reload=not prod)First, we’re instantiating FastAPI() and assigning it to the app variable. That part is pretty self-explanatory. The next line where we add some middleware, however, deserves some explanation.
app = FastAPI()

app.add_middleware(
            CORSMiddleware,
            allow_origins=[f"http://{os.getenv('HOSTNAME')}:3000"],
            allow_credentials=True,
            allow_methods=["*"],
            allow_headers=["*"]
        )

schema = strawberry.Schema(query=Query, mutation=Mutation)
app.include_router(GraphQLRouter(schema), prefix="/graphql")Here, we’re telling FastAPI that we want to allow connections from whatever hostname the HOSTNAME environment variable was set to in our Makefile, on port 3000. This is important, because our frontend web server will be running on port 3000, which will be treated as a different web origin altogether from our backend web server, which will be running on port 8000. You can read more about CORS and why its important here.
            allow_headers=["*"]
        )

schema = strawberry.Schema(query=Query, mutation=Mutation)
app.include_router(GraphQLRouter(schema), prefix="/graphql")

if __name__ == "__main__":Next, we create our Strawberry GraphQL Schema. In our imports at the top of the file, we imported the Query and Mutation classes that will be defined in the gql.py file discussed in the next section. Queries and Mutations are the most commonly used types in GraphQL.
There is a third type that can be added to a Schema object, Subscriptions, which are used for real-time WebSocket based communication with the GraphQL server. They’re pretty cool, but we aren’t going to use those here.
We then create GraphQL router with the Schema we created, mount it at the /graphql route, and pass it to our app as a router. You can mount your GraphQL endpoint at any route, but /graphql seems to be the most common I’ve seen. Remember, if you change this, you’ll have to make sure your frontend web server knows where to find it.
app.include_router(GraphQLRouter(schema), prefix="/graphql")

if __name__ == "__main__":
    prod = os.getenv("PROD") == "1"
uvicorn.run("main:app", host="0.0.0.0", reload=not prod)Here, we’re first determining if we’re in production mode, then starting the uvicorn server programatically. We either enable hot-reloading of the application or not depending on if the PROD environment variable is set to 1. You can use the PROD mode setting to change other behaviors at runtime as well, such as the host or port the server is running on.
The GraphQL schema
Here’s where we actually define the behavior of our GraphQL server:
import strawberry

@strawberry.type
class Message:
    text: str

message = Message(text="Hello World")

@strawberry.type
class Query:
    @strawberry.field
    async def message() -> Message:
        return message

@strawberry.type
class Mutation:
    @strawberry.field
    async def set_message(text: str) -> Message:
        message.text = text
return messageAs mentioned in the previous section, gql.py is where we define our Query and Mutation types. For this example, we only have one field for each:
message = Message(text="Hello World")

@strawberry.type
class Query:
    @strawberry.field
    async def message() -> Message:
        return message

@strawberry.type
class Mutation:
    @strawberry.field
    async def set_message(text: str) -> Message:
        message.text = text
return message- message Query – Returns the globally defined
Messageobject - set_message Mutation – Sets the text of the global
Messageobject and returns it
In a fully-developed GraphQL application, we probably wouldn’t be returning data from a plain old Python object like we are here, but instead using a database of some sort. This database access would typically take place within our defined Strawberry types, where we’d query it, stuff the data into our Strawberry type, then return it, and vice versa for Mutations.
import strawberry

@strawberry.type
class Message:
    text: str

message = Message(text="Hello World")Here’s where we define our custom type Message, which will be returned by the above Query and Mutation. We then instantiate this custom type globally (generally a bad idea, but ok for this example) and that’s the entirety of this application’s data.
Custom types are how GraphQL understands the data your API is working with. You can build a type and return it from a Query, for example, and the GraphQL client on the frontend can pick and choose which fields it wants.
This example has only one custom type Message with one field, a scalar str value called text. The real power of GraphQL comes into play when you have nested types, each of which can be queried in part or in full by the client, preventing the common issue in REST APIs where you are given a ton of data from an endpoint and only using a tiny bit of it.
Frontend
Our frontend will be built with
- A ReactJS application made with create-react-app
- The URQL GraphQL client
The frontend Dockerfile
This Dockerfile will tell docker compose build how to build our backend container image.
from node:16-alpine

workdir /opt/container

copy . .

run npm install && npm install serve

entrypoint ["./entrypoint.sh"]We’re building this image from the node:16-alpine image, which will be pulled from Docker hub automatically. We set the workdir to /opt/container, copy everything from the frontend directory into there, then we run npm install to install all the dependencies described in the package.json file and npm install serve to install the web server that will be used to serve up the React application in production mode.
Our entrypoint is a little more complicated than it was for the backend, so its been moved to its own shell script which we’ll get into next.
The frontend entrypoint
Here’s where Docker will start execution in our container.
#!/bin/sh

if [ "$PROD" -eq "1" ]; then npm run build && npx serve -s build; else npm start; fiAs I mentioned above, this is a little more complicated than it was for our backend server, which just needed to run our main.py file. Here, we’re checking first if we’re in production mode by reading the value of the PROD environment variable, then either running the production server we installed previously in the Dockerfile, or built-in development server that comes with create-react-app. Remember, the built-in server supports hot-reloading of your app code when it changes, and the production server doesn’t (nor should it).
The main App component
This is the main component that’s mounted into the HTMl file generated by create-react-app.
import { Provider } from "urql";
import { urqlClient } from "./utils";

import Message from "./Message";
import MessageForm from "./MessageForm";

function App() {
    return (
        <Provider value={urqlClient}>
            <Message />
            <MessageForm />
        </Provider>
    );
}

export default App;All we’re doing here is returning our Message and MessageForm components:
function App() {
    return (
        <Provider value={urqlClient}>
            <Message />
            <MessageForm />
        </Provider>
    );
} which we’ll describe later, and wrapping them both in an URQL Provider component:
function App() {
    return (
        <Provider value={urqlClient}>
            <Message />
            <MessageForm />
        </Provider>
    );
}with a configuration defined in urqlClient that we’ll describe in the next section.
The URQL config
This is where we tell URQL how to talk to our backend server, and define any other behaviors we need, such as authentication (but not in this example).
import { createClient, defaultExchanges } from "urql";

export const urqlClient = createClient({
    url: `http://${process.env.REACT_APP_HOSTNAME}:8000/graphql`,
    exchanges: [...defaultExchanges]
});We create the URQL client by calling createClient and passing in an object with url and exchanges properties.
export const urqlClient = createClient({
    url: `http://${process.env.REACT_APP_HOSTNAME}:8000/graphql`,
    exchanges: [...defaultExchanges]
});The url property is set to port 8000 on the REACT_APP_HOSTNAME environment variable we set in our docker-compose.yaml file previously described. In create-react-app applications, we can access build-time environment variables in the process.env object, but they have to start with REACT_APP_.
export const urqlClient = createClient({
    url: `http://${process.env.REACT_APP_HOSTNAME}:8000/graphql`,
    exchanges: [...defaultExchanges]
});Here we define our exchanges. Exchanges in URQL are sort of like middleware, each of which have a chance to act on a request or response as its in transit. We’re only going to be using the default ones which can be imported via defaultExchanges from the urql package. We simply unpack them as-is into a list using the ... operator. You can read more about exchanges here.
The Message component
This component queries our GraphQL backend server and displays the message.text in an H1 tag.
import { useQuery } from "urql";

const GET_MESSAGE = `
    query {
        message {
            text
        }
    }
`;

export default function Message() {
    const [{data, fetching}] = useQuery({query: GET_MESSAGE});

    if (fetching) {
        return (
            <h1>Loading...</h1>
        );
    } else {
        return (
            <h1>{data?.message.text}</h1>
        );
    }
}We’re using the useQuery hook from the urql package to query our backend server.
import { useQuery } from "urql";

const GET_MESSAGE = `
    query {
        message {
            text
        }
    }
`;

export default function Message() {We write our actual GraphQL query as a string and save it in GET_MESSAGE. We’re using backtick quotes here so we can format our GQL in a readable way. In the query, we’re telling the server that we’re running the message query which returns a Message type, and we want the text field of that type.
Remember to always specify subfields in your queries if you’re selecting a type that has them. In our example, the Message type has a subfield text. Querying just the message will not return all fields within it.
export default function Message() {
    const [{data, fetching}] = useQuery({query: GET_MESSAGE});

if (fetching) {Here, we actually query the server. The useQuery hook requires you to pass the previously defined GraphQL query string in an object under the query property. It returns an array which we unpack into an object and pull out the data and fetching properties.
- data will contain the actual result of the query when its finished
- fetching is a boolean value that is
truewhen the query is in progress, andfalsewhen its finished.
    const [{data, fetching}] = useQuery({query: GET_MESSAGE});

    if (fetching) {
        return (
            <h1>Loading...</h1>
        );
} else {Before we render anything, we check if we’re still loading the query or not, and if we are, we’ll display “Loading…” instead of trying to access the non-existent data and potentially throwing an error.
            <h1>Loading...</h1>
        );
    } else {
        return (
            <h1>{data?.message.text}</h1>
        );
}Finally, once the loading is complete, we display the message.text data returned from the query. We’re still using the ? notation to access the data just in case data is still undefined for whatever reason.
The MessageForm component
This component will display a text input and submit button to run the set_message mutation on our backend server.
import { useState } from "react";
import { useMutation } from "urql";

const SET_MESSAGE = `
    mutation ($text: String!) {
        setMessage(text: $text) {
            text
        }
    }
`;

export default function Message() {
    const [{fetching}, setMessage] = useMutation(SET_MESSAGE);
    const [text, setText] = useState("");

    const handleSubmit = (ee) => {
        ee.preventDefault();
        setMessage({text});
        setText("");
    };

    return (
        <form onSubmit={handleSubmit}>
            <input
                type="text"
                value={text}
                onChange={(ee) => setText(ee.target.value)}
                disabled={fetching}
            />
            <button type="submit">Submit</button>
        </form>
    );
}All we’re doing here is rendering a form that, when submitted, will run a mutation on the GraphQL server that sets the text of our Message, which will then update what you see in the previously described Message component.
import { useMutation } from "urql";

const SET_MESSAGE = `
    mutation ($text: String!) {
        setMessage(text: $text) {
            text
        }
    }
`;

export default function Message() {Our mutation query takes one argument, which is of type String. The exclamation point at the end of the type means that it’s a required argument. We then specify the setMessage mutation is the one we want to use, and tell it which of the previously described arguments we want to use and in what order. Since this mutation returns the new, updated Message type, we have to also grab the field we want, which is why we specify text as a field we want from the mutation itself.
Note that the mutation name (set_message in the backend server code) is camelCase setMessage in the frontend. This is due to Strawberry automatically exposing it that way, since camelCase is the common style in JavaScript and snake_case is the common style in Python.
export default function Message() {
    const [{fetching}, setMessage] = useMutation(SET_MESSAGE);
const [text, setText] = useState("");Here’s where we’re defining our mutation. We use the useMutation hook from the urql package, and pass in our query. It returns a list of stuff, of which we unpack the fetching flag from the status object, and the function to actually run the query, which we name setMessage. Unlike queries, mutations do not run as soon as the component is rendered, since they usually require some sort of user input. That’s why we need to grab the setMessage function here for future use.
export default function Message() {
    const [{fetching}, setMessage] = useMutation(SET_MESSAGE);
const [text, setText] = useState("");Here we’re using the useState hook from react. We need this to hold the value of the text field we’re about to define so it can be used in our mutation and will remain available between mutations.
    const [{fetching}, setMessage] = useMutation(SET_MESSAGE);
    const [text, setText] = useState("");

    const handleSubmit = (ee) => {
        ee.preventDefault();
        setMessage({text});
        setText("");
    };

return (This arrow function will be called when our form is submitted.
We capture the event as ee and call preventDefault on it to stop the browser from reloading the page, which is the default behavior for form submissions. React doesn’t need that.
Then, we call our mutation and pass in the text from our useState hook. We use the object packing shorthand and just put text in curly brackets because the actual argument name is also text.
After calling the mutation, we clear the text in the input by setting it to an empty string using the setText function returned by useState.
        setText("");
    };

    return (
        <form onSubmit={handleSubmit}>
            <input
                type="text"
                value={text}
                onChange={(ee) => setText(ee.target.value)}
                disabled={fetching}
            />
            <button type="submit">Submit</button>
        </form>
    );
}Finally, we render the form. We set the onSubmit property of the form to our handleSubmit arrow function previously described, and add our input and submit button elements. The input element gets its value from our useHook text value, and when it changes, we have to update it in the state with setText. We also want it to be disabled while running the mutation, so we use the fetching flag to disable it.
Running the Application
From the root of the project directory, run the following:
make setup build devThis will run the initial setup (if anything needs done – necessary if you just cloned this from GitHub), build the containers, and launch the app in development mode.
You should then see the logs start flying by like so:
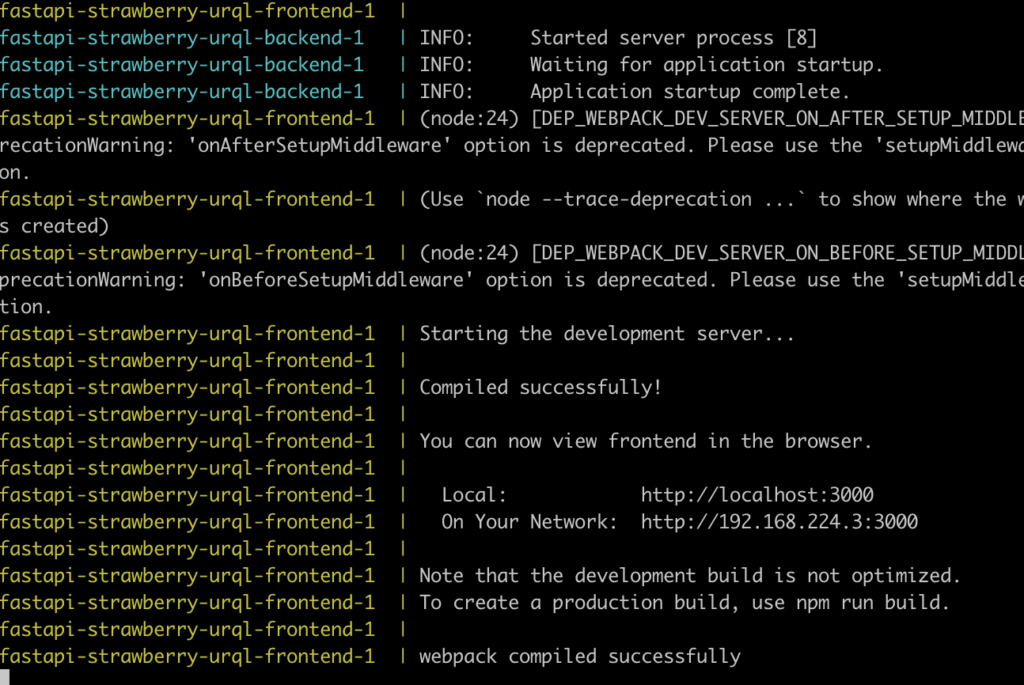
Fire up a web browser on your Linux VM and visit localhost:3000; you should then be able to interact with the app:
Summary
We covered a lot here, so if you’re just learning GraphQL and/or full-stack development, bookmark this page so you can refer to it later.
In this example, we made a docker compose based GraphQL application using FastAPI + Strawberry on the backend, and ReactJS + URQL on the frontend. We covered the DevOps principles behind the project’s design, why we’re using Makefiles, why we split out or docker-compose files into two separate ones, and also dove into the code for each part of the application.
I hope this was helpful, and again, feel free to use this GitHub repo as a starting point for your future GraphQL applications. Happy hacking.

John is a professional software engineer who has been solving problems with code for 15+ years. He has experience with full stack web development, container orchestration, mobile development, DevOps, Windows and Linux kernel development, cybersecurity, and reverse engineering. In his spare time, he’s researching the potential business applications of AI.